
Have you got a special birthday coming up?
Here’s a fab cake you can make without a fuss!
A Peppa Pig Cake for your little one,
Its simple, bright, yummy and fun!
What You’ll need:
Two 8″ Two 6″ sponge cakes, sugar paste icing in blue, green, yellow, white and brown, plus lots of yummy buttercream!
Here’s how to make your very own creative masterpiece….
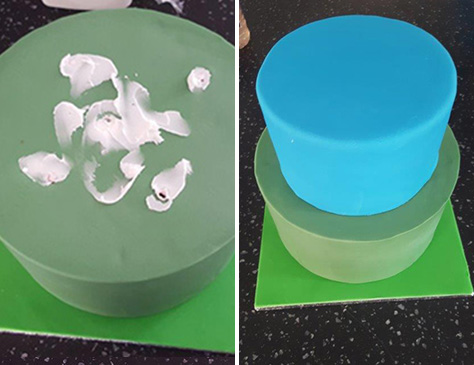
Step 1
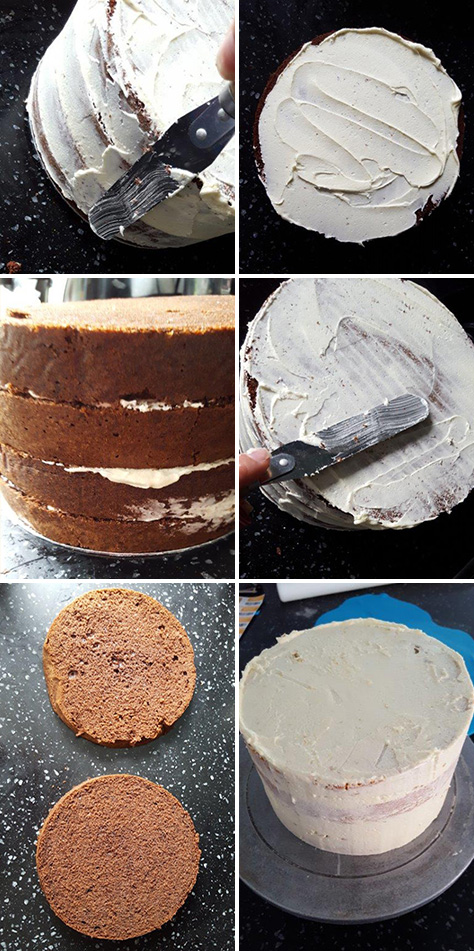
Firstly we’re going to work on your 6″ cakes so carefully slice these cakes in half lengthways so you’re left with effectively four cakes. Next you need to find a board which is the same size as the cake, put a blob of buttercream on the board and stick one of the cakes to it. Then stack your cakes filling each layer with buttercream and finally cover the top and sides in buttercream making it as smooth as you can. Pop your cake in the fridge for 30 minutes so that the buttercream hardens.
Step 2
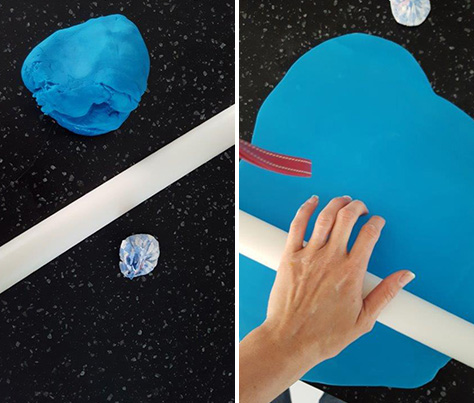
Next, you need to roll out your blue icing. Remember to dust your work surface with icing sugar first so that the icing doesn’t stick to the surface.
Step 3
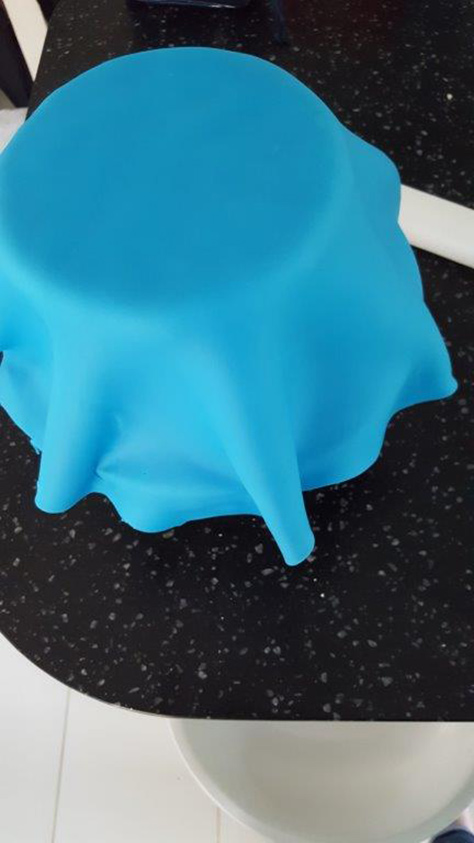
Once your icing is rolled out large enough to cover your cake, take the cake out of the fridge and spray or dab with water which will make your icing stick to the sponge. Next, carefully lift your icing up and place it over the top of your cake.
Step 4
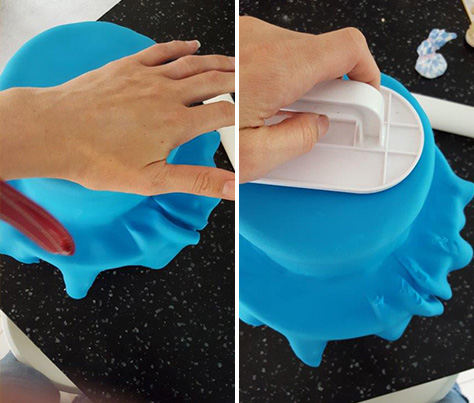
Gently smooth the top of the cake outwards with the palm of your hands and then continue this down the side of your cake. Use a smoother if you have one as it will make this process a little easier.
Step 5

Cut off any excess icing from the bottom of the cake using a knife, and then repeat steps 1-5 with your 8” cakes but using green icing instead of blue.
Step 6
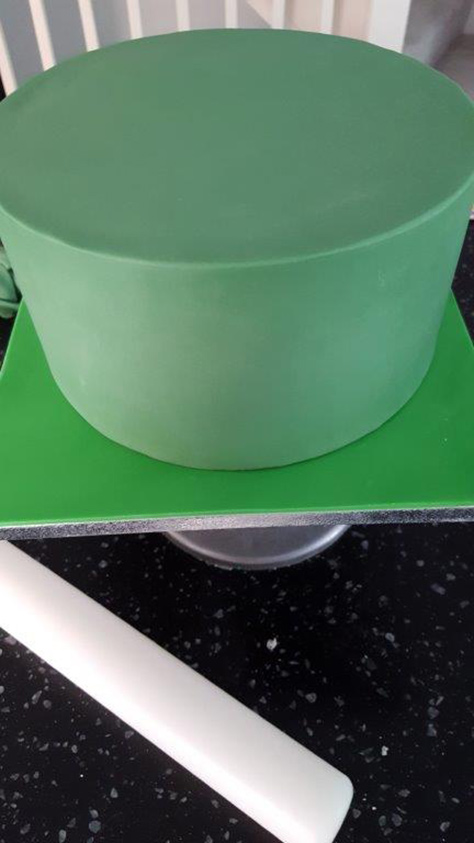
Place your 8” cake onto a 10” cake board making sure it is stuck down to the board with buttercream and placing the cake on top.
Step 7
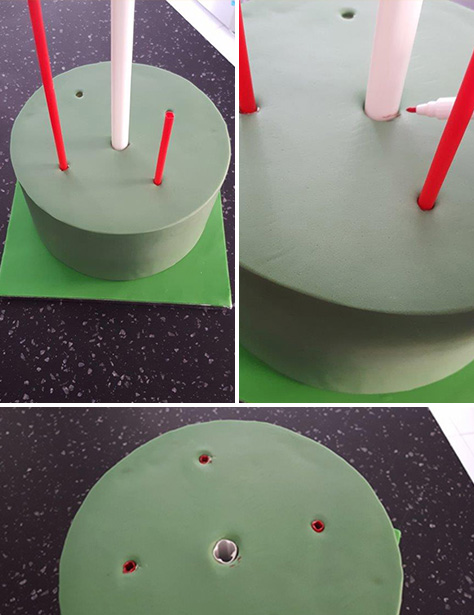
Now you must use dowels to stop the cakes sinking into each other. To do this push the dowels into your 8″ green cake in a 5” circle from the centre (see pic above). Mark a line where they need to be cut, remove them from the cake to cut them, and then push them back in the same holes so they are flush with the cake.
Step 8
Next, put buttercream on top of the dowels and then place your 6”cake on top of your 8” cake.
Step 9
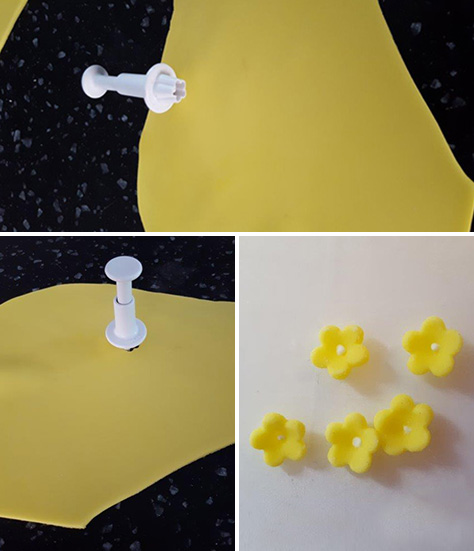
Now the really fun part – decorating your cake! Start by using yellow icing to cut flowers out using a blossom cutter (these are readily available online and from some supermarkets).
Step 10
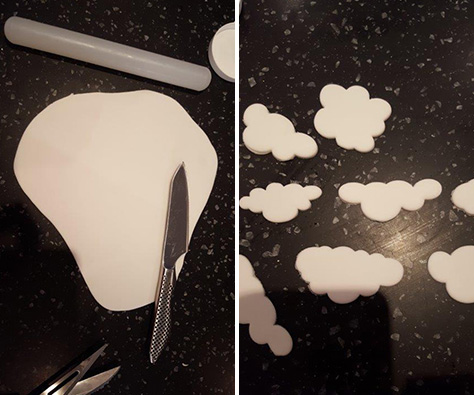
Now to make the clouds roll out white icing and cut out cloud shapes using a knife.
Step 11
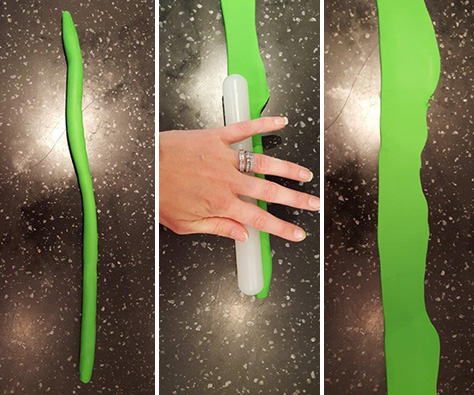
You’ll then need to make the hills. To do this make a long sausage using green icing then roll it flat.
Step 12
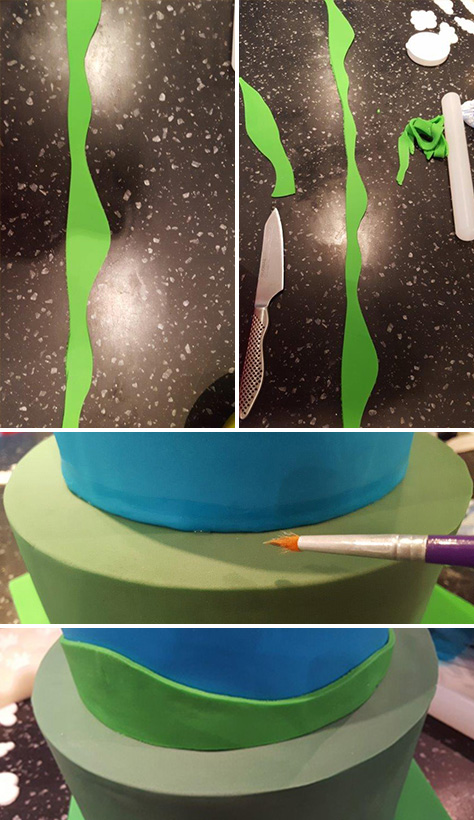
Then, carefully cut out one long strip of ‘hills’. Once you have done this, grab some water and brush it around the base of your 6” cake which means you can then stick the hills you have just made to your 6” cake. Repeat exactly the same process with your 8” cake.
Step 13
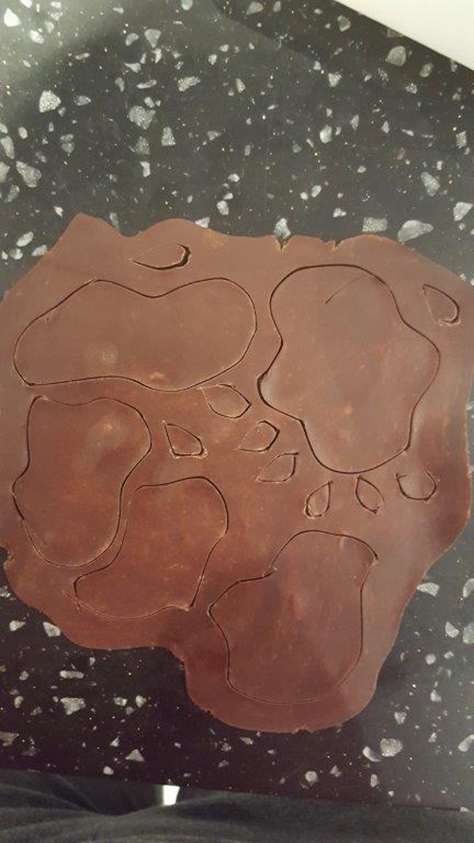
We can’t forget the muddy puddles! To make these, roll out brown icing and cut puddle shapes and splash shapes.
Step 14
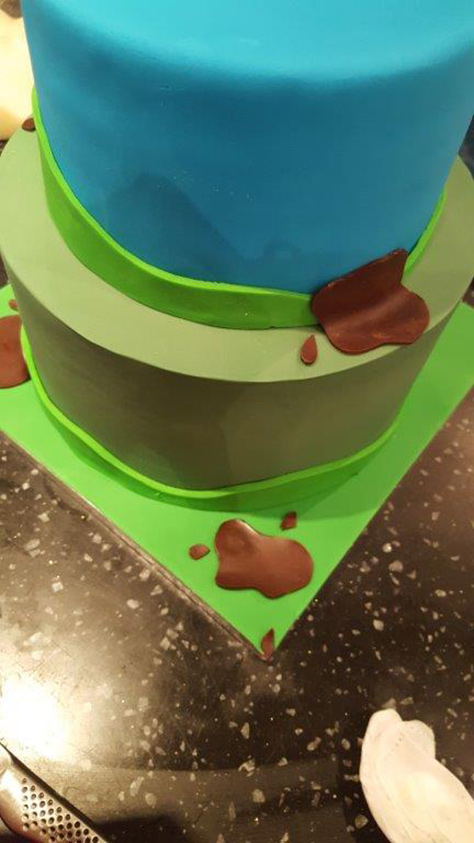
Stick these to your cake using the brush and water method.
Step 15
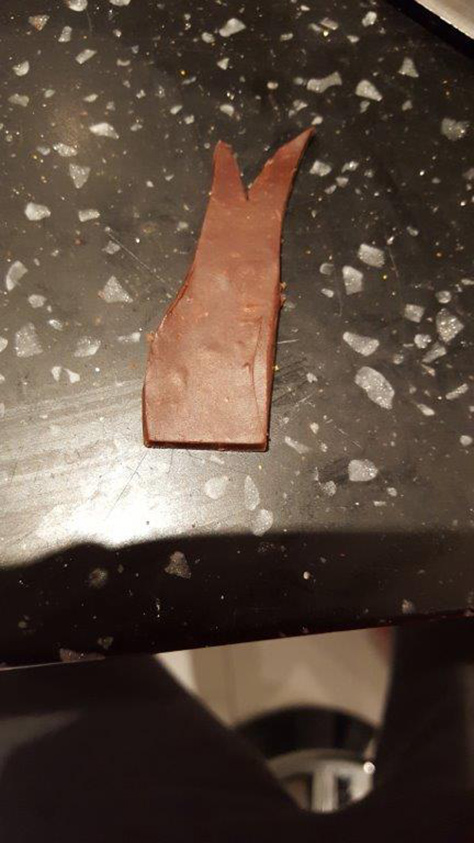
Next for the trees – again using your brown icing cut out 6 tree trunk shapes.
Step 16
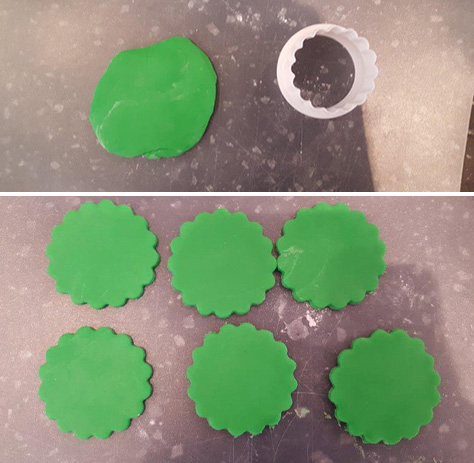
To make the tops of your trees roll out green icing using a curved edge circle cutter, and cut 6 circles (see pic above). Why not use some red edible balls to make ‘apples’ on the trees.
Step 17

Stick the tree trunk shapes and the treetops shapes to your cake using the brush and water method.
Step 18
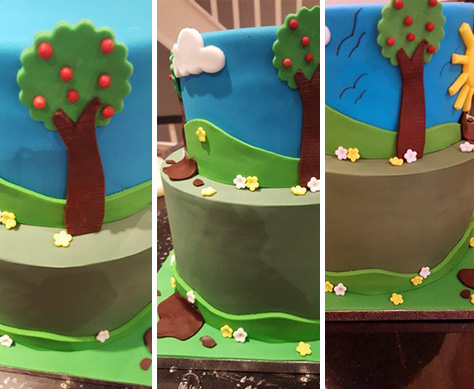
You can now stick your clouds and flowers on your cake.
Step 19
I also used an edible pen and drew seagulls in the sky, and made a sun out of yellow icing and a house but these are not essential. You can be as creative as you like so have fun!
Step 20
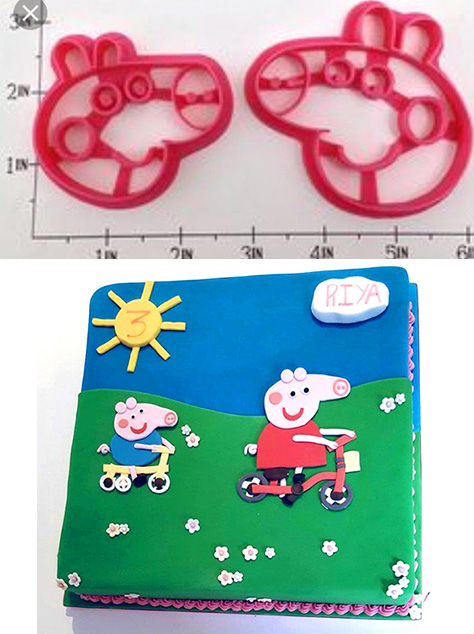
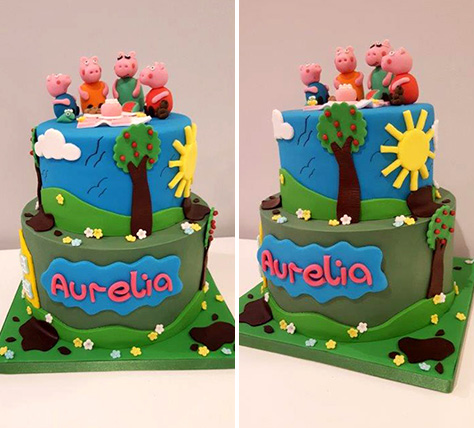
On the top of cake cut out Peppa Pig figures using Peppa Pig cutters (easily available online) or you can cut them freehand yourself. I have made 3D Peppa Pig figures but this is much more challenging!
Thank you Rachel from BakeryBoxx for showing us how to create this surprisingly easy but super impressive Peppa Pig Birthday Cake. Follow her step by step guide for Birthdays cake perfection!
To see more of Rachel’s beautiful cakes, click here
BakeryBoxx create and deliver cakes to your door for Birthdays, Weddings, Christenings and all special occasions
Have you made a beautiful birthday cake? We’d really love to know! Someone else might love it, and really want to have a go! If you’ve got ideas, suggestions or reviews, you can shout all about it on whatever channel you choose! Let’s go on a Picniq! Follow us on Facebook, Twitter or tag us on Instagram using #PicniqUK!